Category Archives: wireless

IC Real Tech Allie Camera at CES


IC Real Tech logoWeb and IP cams are ten a penny these days, but the IC Real Tech Allie takes expectations to a whole new level with a near 720 degree field of view and the ability to stop time. Todd gets a demo from Matt on how the Allie Pro can see everything.

The Allie Pro is an IP cam with two lenses, one on the front and one on the back, that have overlapping fields of view. As result, when viewed in real-time on a tablet or smartphone, the image can be panned round in nearly 720 degrees; left-to-right, up-and-down with no blindspots. The complementary apps on both iOS and Android can either use touch or the motion sensors to move round the image. Live video is fed through but if something catches the eye, the video can be paused and the frozen image explored in more detail.

There are three models in the range, Allie Play, Home and Pro, with increasing levels of video resolution and prices to match at $399, $599 and approx $1100 for the Pro. All available in late Q1.

These cameras are awesome and I can see tremendous potential for pseudo-telepresence, perhaps combined with a simple VR setup like Google Cardboard. Turn your head, turn the view. And think of a head-mounted action cam version! Watch the video – you’ll be impressed.

Interview by Todd Cochrane of Geek News Central for the TechPodcast Network.

Become a GNC Insider Today!

Support my CES 2020 Sponsor:
$0.01 GoDaddy coupon for a New domain name cjcfs3geek
$1.99 / mo Economy Hosting with a free domain. Promo Code: cjcgeek1h
$2.99 / mo Managed WordPress Hosting with free Domain. Promo Code: cjcgeek1w
Support the show by becoming a Geek News Central Insider

Kelvin Wireless Wine Thermometer at CES


Kelvin LogoWatching the video for the Kelvin Duo wireless wine thermometer put me in mind for a glass, so as I write this, I’ve a tasty little Sicilian red to hand. But how do I know that I’m getting the best from the wine? Let the wine breathe – check. Wide glass – check. Temperature….hmm, not so sure about that…and that’s where the Kelvin thermometer comes to the rescue.

The Kelvin Duo consists of a thermometer band that goes round the bottle, transmitting the temperature to a receiver which in turn shows the temp on a small screen. The screen’s backlight is colour-coded to red, green and blue for too warm, just right and too cold.  The Kelvin is straightforward to use: first choose your wine, second select the category of wine from a choice of ten (four for white, three for red, two for sparkling and one for rosé), next put the band on the bottle and the bottle in the fridge. Finally, wait for the receiver screen to get into the green (or just flick into the blue) then pour and enjoy!

The Kelvin Duo is already on sale in the UK for £39.99 and will be coming to the US in the coming months with a price somewhere around $70-$80.

Interview by Todd Cochrane of Geek News Central for the TechPodcast Network.

Become a GNC Insider Today!

Support my CES 2020 Sponsor:
$0.01 GoDaddy coupon for a New domain name cjcfs3geek
$1.99 / mo Economy Hosting with a free domain. Promo Code: cjcgeek1h
$2.99 / mo Managed WordPress Hosting with free Domain. Promo Code: cjcgeek1w
Support the show by becoming a Geek News Central Insider

Boingo Builds SMART Wireless Networks


boingo logoMany of us will be familiar with Boingo from their public wifi hotspots in airports and coffee houses, though the company provides many more radio-based services to advertisers, sporting arenas and the military. Marlo finds out more about Boingo Wireless and their plans from Dr Derek Peterson, Chief Technology Officer.

When build large-scale wireless networks, it’s not simply a case of putting up more and more access points – it’s far more complex than that with competing needs from the users. Boingo considers each implementation as a “SMART” network, their acronym for Secure, Multiple devices and models, Analytics, Responsiveness and Tiered services. With these aspects in mind, the appropriate design, technologies and policies can be put in place. Watch the video to learn more about Boingo’s approach and the current trends in the wireless market.

Interview by Marlo Anderson of The Tech Ranch. Note that Marlo’s audio is missing for the first few questions.

Become a GNC Insider Today!

Support my CES 2020 Sponsor:
$0.01 GoDaddy coupon for a New domain name cjcfs3geek
$1.99 / mo Economy Hosting with a free domain. Promo Code: cjcgeek1h
$2.99 / mo Managed WordPress Hosting with free Domain. Promo Code: cjcgeek1w
Support the show by becoming a Geek News Central Insider

Archos Smart Home Review


Archos Logo
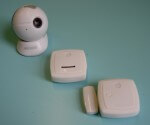
These days it’s either i-this or smart-that with new gadgets measuring and changing our personal environment. From Fitbit to Philips Hue, the internet of things is steadily growing and into this increasingly connected world, French firm Archos have stepped in. Their Smart Home tablet wirelessly connects sensors to a central hub that monitors and initiates actions based on conditions. Archos kindly lent me a Smart Home to raise the IQ of my house. Let’s take a look.

Archos Smart Home Box

In the box there’s the Smart Home tablet, plus six connected objects; two mini-cams, two movement tags and two weather tags. The tablet itself looks much like a digital photo frame but it’s actually a small 7″ device running Android 4.2.

Archos Smart Home Front View

Archos Smart Home Rear View

In the looks department, the Smart Home tablet fits the bill with styling that wouldn’t look out of place in a living room. It is all plastic, including the screen which seems to be acrylic rather than glass, but perhaps will better withstand being knocked. Some thought has been given to the design as the screen’s viewing angle appears to be have been adjusted slightly so that screen looks good when someone looks down at it, rather than straight on. There’s only about 2.5 GB of free memory on-board but there is a microSD card slot to boost the Smart Home’s capacity. Performance-wise, it’s no speed demon with a 1.2 GHz ARM processor, but as most of the time the Smart Home just sits there receiving data, it’s a not a big deal. A camera and a thermometer are built into the tablet too and these can be used to take pictures and measure the temperatureas well as the connected objects.

The connected objects are shown below with the mini-cam, weather tag and movement tag from left to right. All have sticky pads which allow adhesion to flat surfaces round the house. The mini-cam ball is held in the foot by magnets and it means the ball can oriented in almost any direction. The weather tag measures temperature and humidity, and the movement tag can measure both motion and door opening / closing.

Archos Smart Home Sensors

Getting setup is easy and straightforward. Running the Archos Smart Home software initially asks for the different rooms where devices are located.

Smart Home Rooms

Once the rooms are setup, the connected objects can be added into the relevant room. The objects use Bluetooth rather than Zigbee and pairing is simply a case of holding down a button on the connected object for 5 seconds. It worked flawlessly. The pairing screen shows all the objects available, not only the ones in the box.

Accessories

Once all setup, the Smart Home tablet presents a view with the room and all the objects in the room.

Hall

In the Hall, I had two mini-cams, a weather tag and a movement tag. Tapping on any device in the app then gives more data or information – here’s the weather tag showing data over the past week for both temperature and humidity.

Temperature and Humidity

Great but how do we get from monitoring the weather to doing something smart? Archos have the answer by building simple “if this, do that” programs. For example, if temperature falls below two degrees Celsius, email to me “It might be slippy.” Or more usefully, if the door opens, take a picture and send an email – like this.

Program

Sure enough, when the front door is opened, I get an email (my personal email is address is obscured by the black box).

Mail


The mini-cam also takes a picture (or a short video) but they won’t show a live feed, presumably because Bluetooth can’t transfer the data very quickly. You’ll notice one of the slight problems….the Smart Home doesn’t really take pictures fast enough as in many of the photos the person who opened the door has already moved out of shot. These are all real life photos, nothing was staged. A mini-cam positioned further down the hall generally did better at getting people entering the property.

Minicam Pictures

Out of the box, there’s a fairly limited range of actions such as send email, turn on plug and so on, but Smart Home can use the Tasker app to do more. Tasker supports a wide range of actions, including starting other apps, which makes it quite a powerful solution. However, even this simple email-me-on-the-front-door-opening is useful when wanting to know if someone has arrived home safely (or a thief has broken into your house!)

Other nifty features are that the Smart Home can be accessed from other tablets or smartphones. After a straightforward authorisation process, the system can be viewed from other devices both inside and outside the house. Here’s what it looks like on my smartphone.

Smartphone View

Overall, the Smart Home worked well, mostly sitting on the table doing its job. I did find that I mostly used my ordinary tablet (a Nexus 7)  to work with the Smart Home rather than picking up the unit itself. I set the Smart Home tablet up as a digital photo frame using the standard Android Daydream screensaver to fit into the room.

There were a couple of problems, the first being the range and penetration of Bluetooth. I live in a modest house with brick walls which meant that the weather tag at the rear of the property couldn’t be picked up if the Smart Home tablet was in the front room. Secondly, battery life – the mini-cams seemed get through a set of batteries in about a fortnight and each one took three CR2450 button cells. The movement and weather tags weren’t quite so bad – perhaps a month and only one battery. As an aside there’s no way of muting the low battery warnings that appear in orange on the screen. A connected object could be disconnected but that deleted the historical date at the same time.

Bizarrely, the other problem was how I felt about spying on my family, which is not anything to do with the Archos Smart Home, so I’ll save that for another post. I can see the Smart Home working for families with children that come home when the parents are still at work and the email notifications would give any parent a measure of comfort that their son or daughter is home safe.

The Smart Home costs GB£199 from Archos’ online store. Other additional connected objects are “coming soon”, including an HD weatherproof camera and a siren tag. In summary, the Smart Home is a well integrated system that has room for expansion with more types of connected objects but watch out for the limitations of Bluetooth range and battery life.

Thanks to Archos for the loan of the Smart Home.


Optoma ML1500 DLP Projector Review


Optoma LogoThe Optoma ML1500 DLP Projector is a stylish ultra mobile LED projector which pretty much does it all in a very neat little package with a good complement of ports, connections and fun tricks. Let’s take a look.

Optoma Front

Measuring just 27 x 17 x 4.5 cm and weighing only 1.4 kg, the ML1500 is very portable and comes with a neoprene carrying case. As you’ll see from the photos, the projector is attractively styled, with the ports on the back and a touchpad on the top. The touchpad can be used to operate the built-in menus to control the ML1500 and there is also a supplied remote control for when changes need to be made from afar. On the bottom, a third leg can be screwed in and out to adjust the angle, and a standard photo mount allows the projector to be hung from above. Finally, a lever on the side controls the focus.

Optoma ML1500 Rear

Round the back there is a plethora of connections, with composite video, HDMI and VGA connectors, 3.5mm jacks for audio and microUSB, USB and SD card slots. Connect up the ML1500 to a PC or laptop and it appears as an Optoma WXGA (1280×800) monitor and with suitable OS, you can do the usual tricks of either reproducing the current desktop or extending the desktop to the ML1500’s display. Locking onto the VGA signal took a second or two, but nothing out of the ordinary. The small size of the projector meant that I could keep it on my desk and if I needed to have an impromptu team meeting that needed something shown, I could quickly turn the ML1500 onto a nearby wall, rather than everyone huddle round a monitor.

Optoma ML1500 Remote ControlOn the fun side, the ML1500 makes a good partner to mini media streamers like the Roku Streaming Stick or Chromecast. The stick can be plugged into the ML1500’s HDMI sockets and power pulled from an adjacent USB socket. All set and good to watch Netflix or other streaming service with minimum of fuss.

The ML1500 does a few other tricks up its sleeve (or USB port as the case may be). First of all, the projector has a built-in media player and office document viewer that will show films, play music and display Word, Excel, Powerpoint and PDF files directly from either an SD card or USB memory stick. I didn’t deliberately try to break the viewer but the ML1500 managed to cope with all the Office documents that I threw at it. It’s relatively easy to navigate round the documents and zoom in or out with the remote control. The on-screen menus are easy to navigate with large friendly icons showing the way.

Playing movies is cool too, with the ML1500 handling mp4, avi and mov format files (though I didn’t confirm the codecs inside each). The presentation is good with the projector keeping up with the action and the picture is fine in unlit room – it doesn’t need to be darkened. Obviously you can have a pretty big screen if you want – I watched a couple of films and really got into the cinematic feel of things. Colours were good and sound is ok – it’s not hifi but you can connect up via a 3.5 mm jack if you want more oomph.

Optoma WiFi DongleNext on the list of clever things is the USB wifi dongle which plugs into the ML1500. Once connected to the “Optoma Display” wireless network, you can use an app on your smartphone or tablet to play presentations and display media. I used WiFi-Doc on Android and the app is available for iPhone and iPad too. It’s easy to use – select what you want to show and it’ll be shown by the ML1500. You can zoom in and out of photos and documents, and about a second later, the projector will update to show the change. Here’s the app showing a photo of the house that Mel Gibson used while filming Braveheart. The app wasn’t quite as good as the built-in player when it came showing office files as a couple of pdfs had missing images.WiFi-Doc App

A final nifty feature was auto-keystone correction, where the ML1500 automatically adjusts the projection to account for the angle of the projector, which means that the picture on the screen is always rectangular and not fatter at the top than the bottom.

One minor niggle is that adjusting the focus has to be done manually and it can’t be corrected using the remote control. Not a big deal in most circumstances but could be an issue if the projector was mounted high up.

Although I’m not a projector expert, I enjoyed putting the ML1500 through its paces. Its comprehensive ports and built-in media player make it a good choice for both business and pleasure, and for those on the move, the low weight and PC-free capabilities, are attractive. I think it’s priced about right too at under £700.

Thanks to Optoma for the review unit.


Libratone Zipp Wireless Speaker Review


I first came across Libratone at the The Gadget Show earlier in the year where their colourful hi-fi speakers with interchangeable covers stood out against the more run-of-the-mill Bluetooth speakers. On the back of my interview, Libratone kindly sent me a Zipp, a portable wireless AirPlay speaker, to further my education in their products. Let’s take a look and a listen.

Libratone Zipp Box

The Libratone Zipp is very much fashioned in iStyle but takes a welcome break from monochrome with interchangeable coloured covers. The Zipp comes with three covers in the box from three collections and the supplied Zipp came with the “Funky collection” – pepper black, plum purple and pineapple yellow. Additional covers are £39 which may seem expensive but the covers aren’t felt or fleece, they’re Italian wool. Here’s the Zipp in its different clothes.

Libratone Zipp Magenta

Libratone Zipp Mustard Strap

Changing a cover is easy – just unzip the cover, carefully remove it, fit the the new cover and zip it back up. There’s a small frame which fits around the control panel but it clips in firmly and helps get everything lined up. The panel’s neatly hidden behind the leather carry strap.

Libratone Zipp Mustard Strap Up

As a wireless speaker, the Zipp uses wifi rather than Bluetooth to stream music and until relatively recently, you would have needed Apple products to use AirPlay. Android users can now join the party as the Zipp now provides a DLNA interface which several music apps now support including Robin Davis’ 2player, which I used for this review. Sadly, many don’t, including Spotify, which is a shame.

The speaker can work in two modes, DirectPlay and WiFi Play. In the first, the speaker creates its own little wifi hotspot and the smartphone or tablet connects to the hotspot. This mode is used both for initial configuration and for playing music away from home, say, at a friend’s BBQ. With the WiFi Play mode, the Zipp connects to the same wifi network as the music-playing device, which is the way you’d use the Zipp at home.

Setting up the Zipp is a little fiddly but otherwise straightforward and only needs to be done once. Libratone’s free app helps with this but the steps are broadly turn on the Zipp, connect to the Zipp’s wifi hotspot, enter the main wifi key and restart the Zipp. It’ll then connect up to the main wifi network and the speaker will be available for music output.

Libratone App 2player Erasure

Obviously the Zipp is only a single unit, although it has an amazing capacity to fill a room. Libratone have developed a set of acoustic tricks called “FullRoom” which let the Zipp’s tweeters and drivers expand the sound, but you need to tell the Zipp where it is in the room to take full advantage. The Libratone app helps with that too. You can hear the impact of some of the changes if you fiddle with the settings while music is playing but much of the change is subtle.

Voicing Position

In addition to setting the spatial characteristics, the type of music can be enhanced through preset equalisations such as “Easy Listening” and “Rock the House”.

Aside from the interchangeable covers, the other cool feature is that the Zipp is portable and has a built-in battery which Libratone says will last about 4 hours playing music over wifi and twice as long using a cable. I didn’t try running the Zipp very long from a lead but the time seems about right for wifi. The Libratone app helpfully shows the battery level so you know when to recharge. There’s a small bag included in the box but Libratone could do with a dedicated Zipp carrying bag as it’s heavy to lug around – it’s portable but it’s not a travel accessory.  I liked the liberty that this gave as I moved the Zipp between rooms and was able to have music in rooms that didn’t normally have sound without using headphones.

Libratone Zipp Panel Libratone Zipp Top Control

The pictures above show the panel on the side and the top-mounted controller. The USB port on the side-panel can be used to power the music player (and for configuration when using Apple devices) when using the 3.5mm jack for the audio feed.

Generally the Zipp worked well. I did have the occasional problem with the Zipp not being recognised either as an output option in the 2player app or by the Libratone app when trying to change the FullRoom config. Usually a restart of either the app or the Zipp itself would sort it out but it’s a bit irritating when the dropout occurs halfway through an album. To be fair, the issue could lie with my wifi network or with the music app itself and I’ve no experience with other AirPlay devices for comparison. For now, it’s something to be aware of.

As a reminder, Android users needs to confirm that the apps that they want to use with the Zipp are AirPlay or DLNA-compatible. Unlike Bluetooth speakers, where the driver is at lower level and makes almost any app capable of outputting sound to a wireless speaker, the apps needs to be DLNA-aware to use the Zipp wirelessly. Searching the Play Store reveals several good apps that can be checked for full compatibility.

So….does the Zipp sound good? In short, it’s very impressive with music retaining clarity and detail even at higher volumes and the Zipp has a surprising amount of volume for such a small unit. Obviously any single speaker unit is going to be lacking in comparison with hi-fi separates but the Zipp knocks into a cocked hat any of the speaker docks that I’ve heard. Finally, it’s absolutely, definitely the best portable speaker that I’ve ever listened to. At GB£369, it’s not cheap but if you have a bijou pad that needs filled with sound, you should give the Zipp a listen. It looks great too.

Thanks to Libratone for the loan of the Zipp.


TP-Link ACes Wi-Fi at The Gadget Show


Like many families now, it’s not unusual for everyone to be using the wi-fi network at home at the same time. Game consoles, tablets, media players and smart TVs all take their share of the data stream, and with the potential for multiple HD streams, the wireless takes a real hammering. In response to this demand, 11ac wireless uses dual frequencies and multiple antennae to get gigabit class data speeds, while still being backwards compatible with the older standards.

TP-Link Stand at GSL14

Under the Archer brand, TP-Link have a range of 11ac routers and modems, starting with twin antennae 750 Mb/s Archer C2 up to the three antennae 1750 Mb/s Archer C7. TP-Link has kindly sent one of the latter to GNC for review, so I’ll be taking a look at that later.

At The Gadget Show, I caught up with Simon from TP-Link who told me a little about their design philosophy and what they’re aiming for with the new 11ac routers.